HEXTA TARGETS
SETTING UP MONITORS
Shooters & Scorers
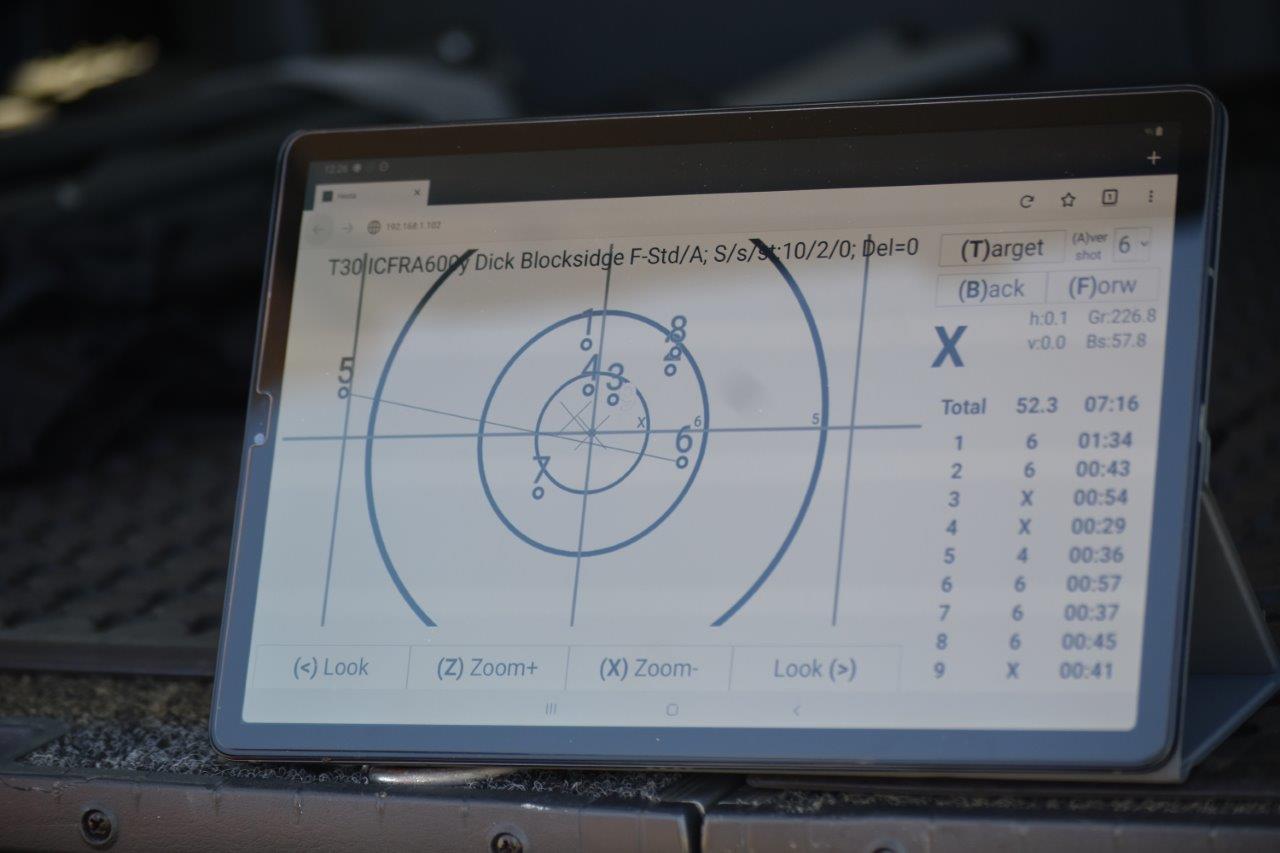
Shooter monitor - Functions & features
-
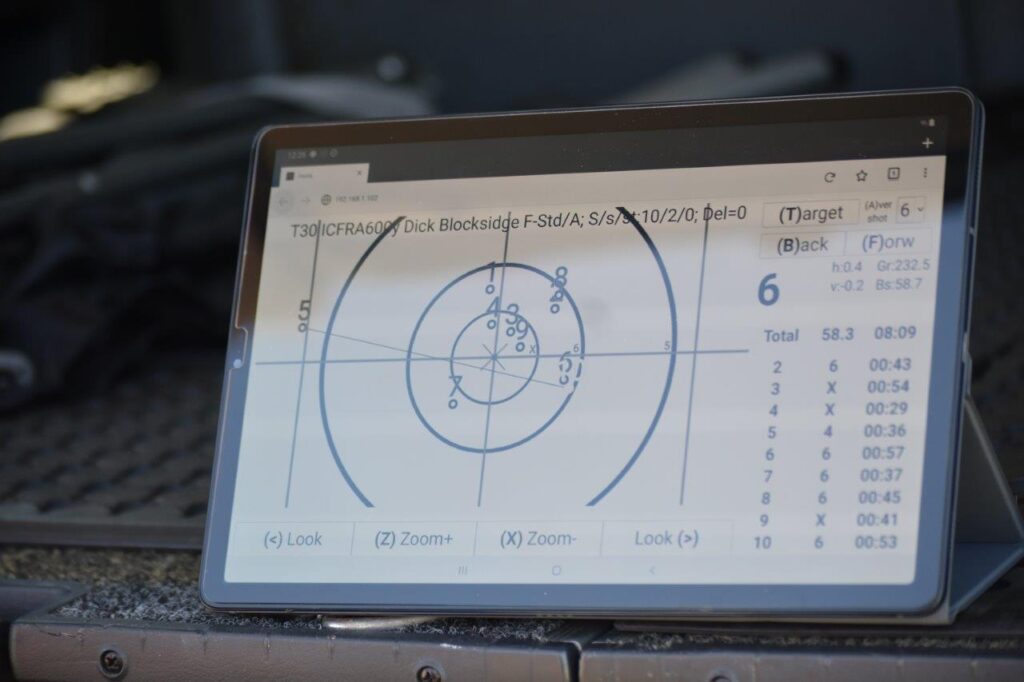
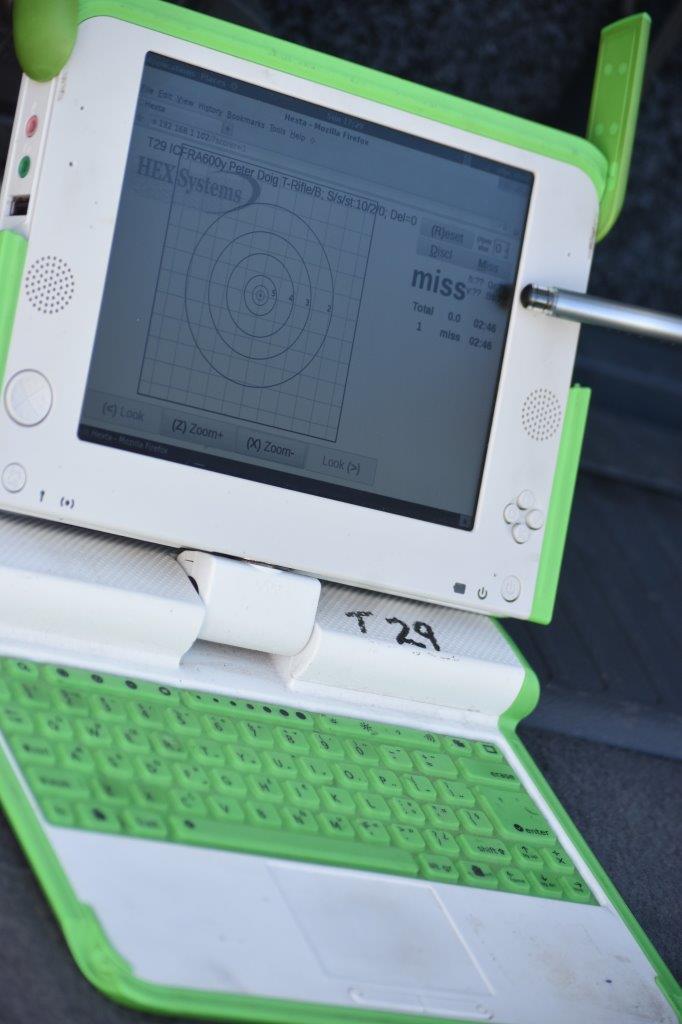
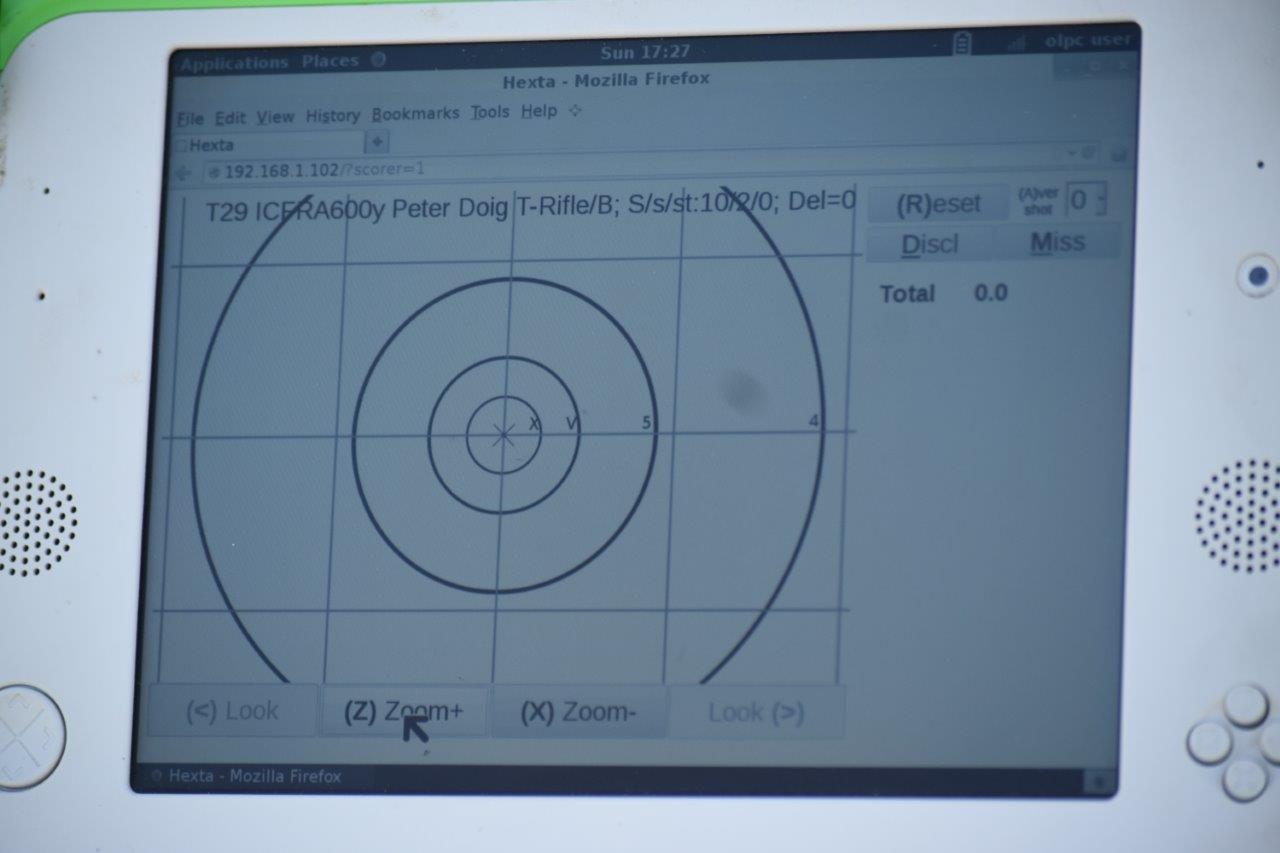
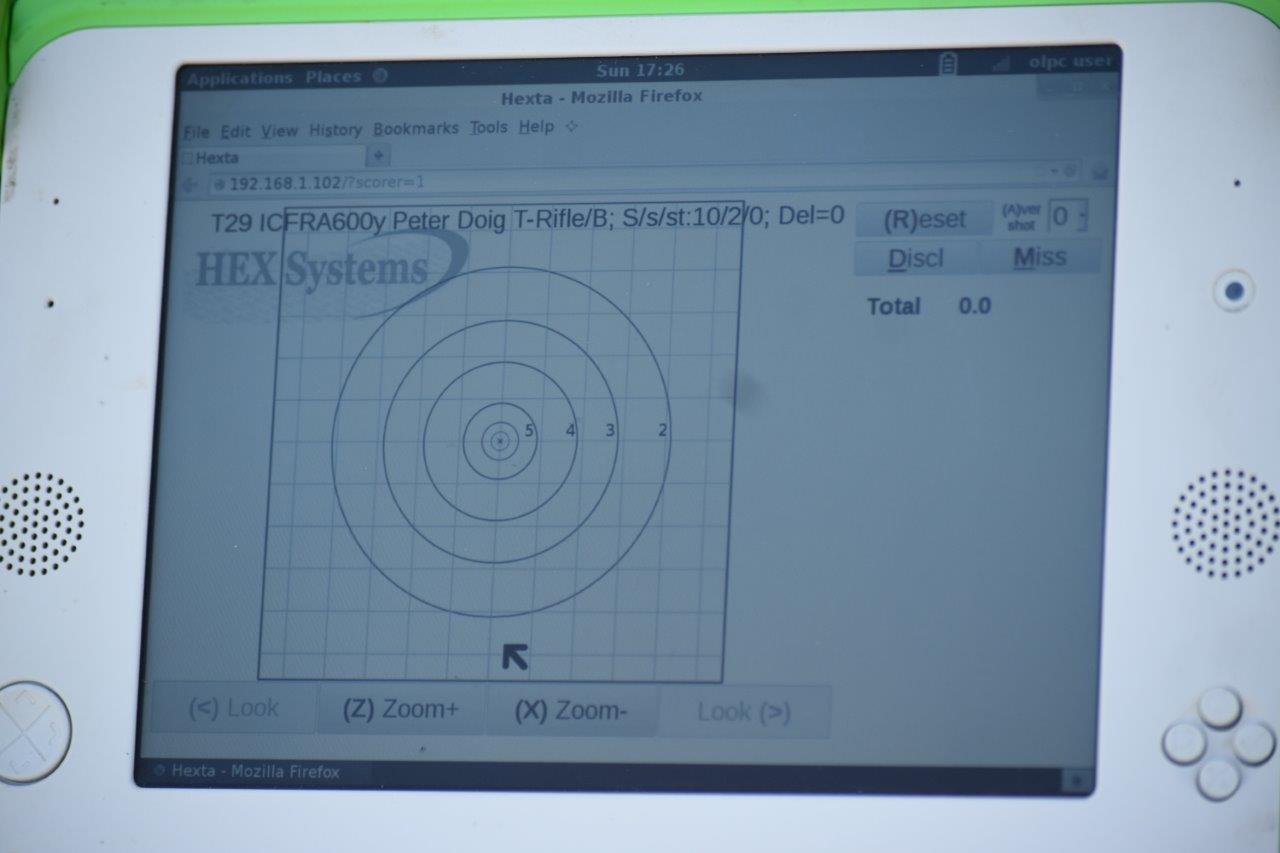
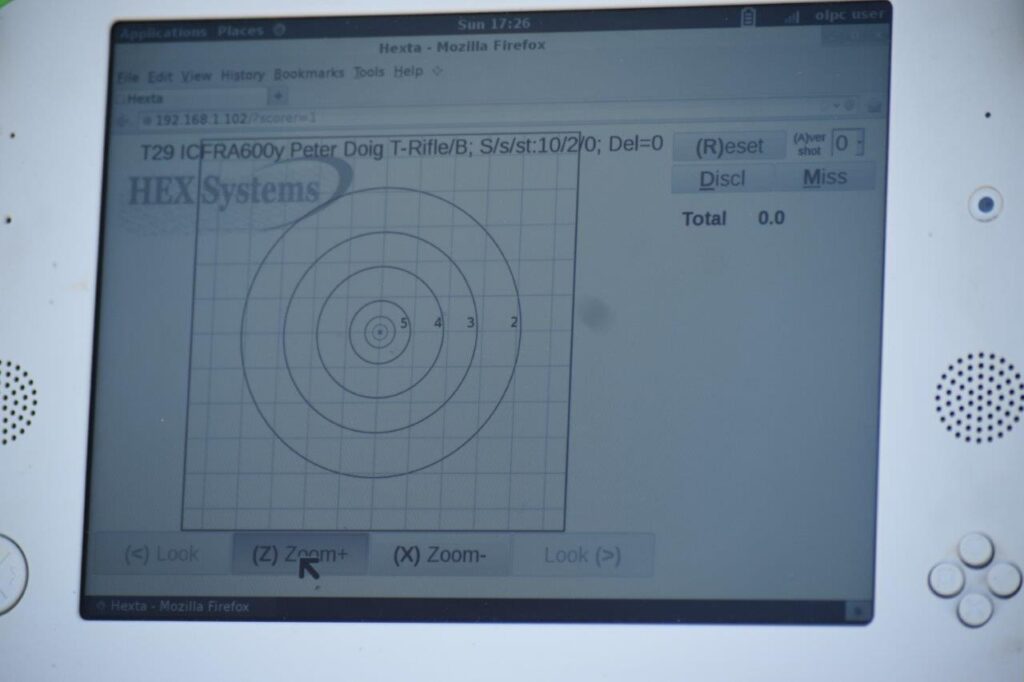
Shot plot display
Each grid line represents 1 MOA at every range distance and zoom level
-
Zoom
4 stages of zoom and then returns to initial zoom level
-
Look Left and Look Right
Each tab press jumps one more target left or right – after 7 sec screen returns to home target
-
Volume
Should only be adjusted by ET Assist members
-
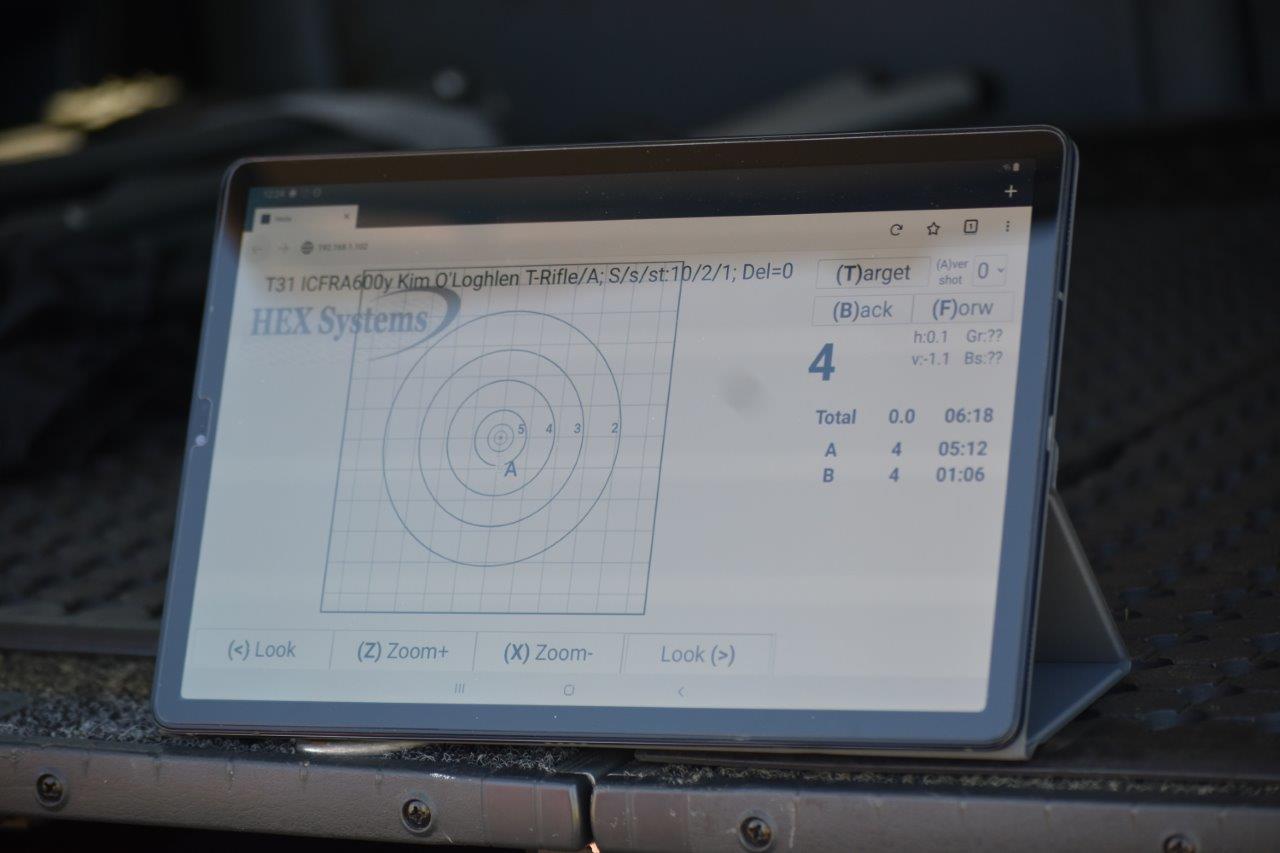
Centre of group plot
max 6 counting shots – leave set to “0” unless using for training/development purposes.
-
Group Size
Distance between furthest two shots
-
Berdan String
In the HEXTA Database the Berdan string value is the average distance to the centre for all counted shots. The average value is updated with each additional shot.
Details displayed on the top left of screen
- Target Number
- Shooting Distance
- Shooter Name
- Shooting Discipline
- Shooting Grade
- Number of counting shots
- Number of sighters
- Stage number
Note – Use Stage “0” for all practice and trial shooting. Only use Stage 1, 2 etc. for counting competition shoots.
Warning – Don’t leave monitors with screen facing directly into the sun as it may cause the monitor to overheat.
Note – Hexta System Warnings and Error Messages DO NOT appear on the Shooter Monitor, except for a “Monitor connecting” message if the individual monitor is disconnected from the Range server.
Scorer's monitor - Functions & features
The Scorer’s Monitor is used to
- Set up the monitor for a specific club, target number, distance and shooter session
- Record and plot a shooting string
- Cut Sighters
- Disclaim shots
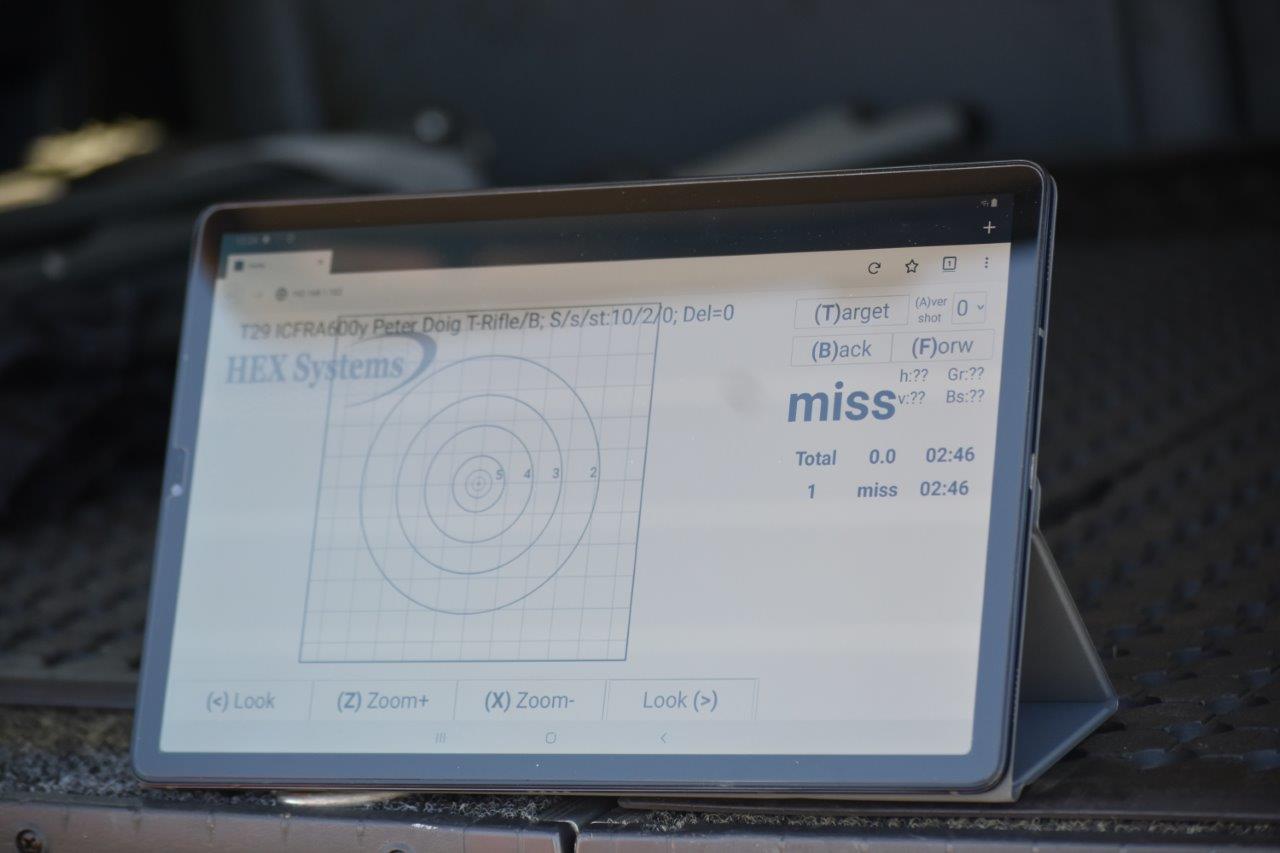
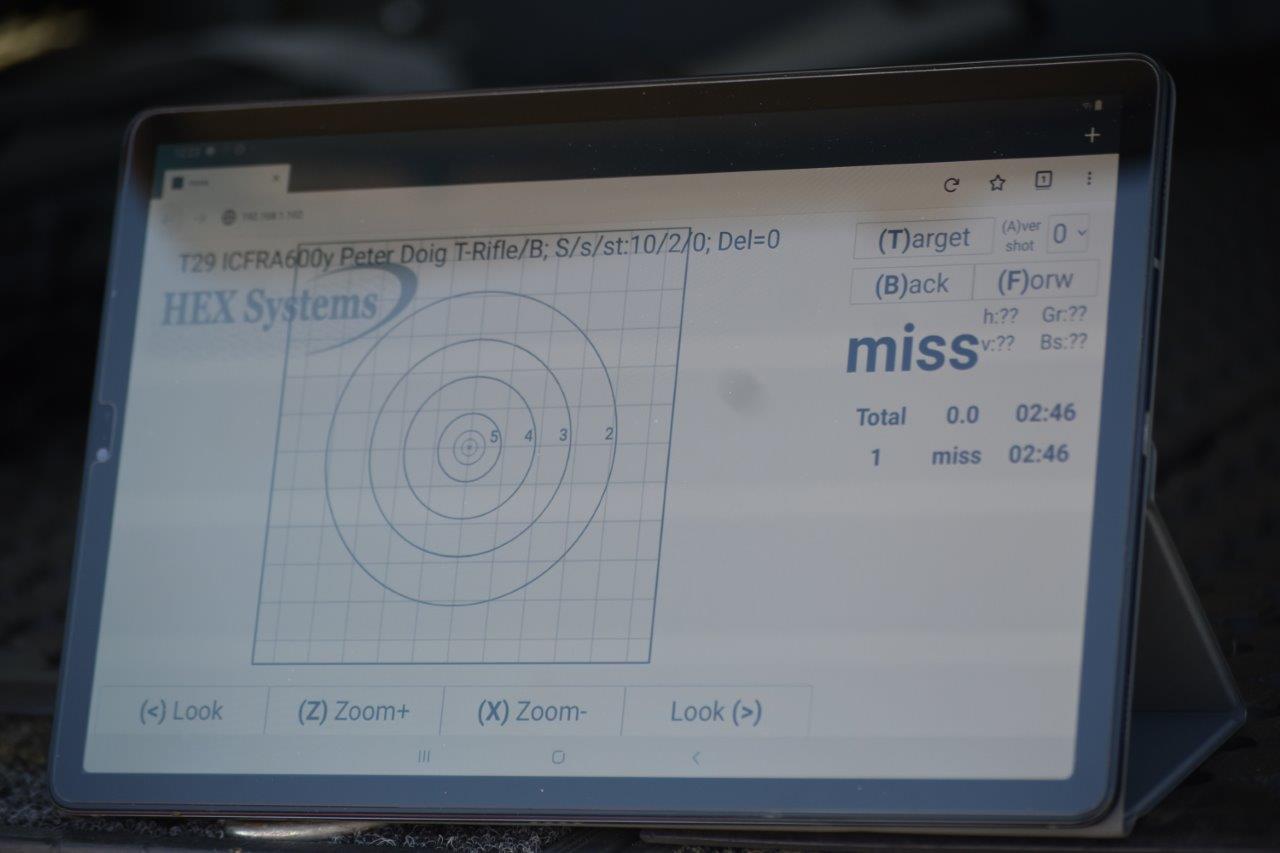
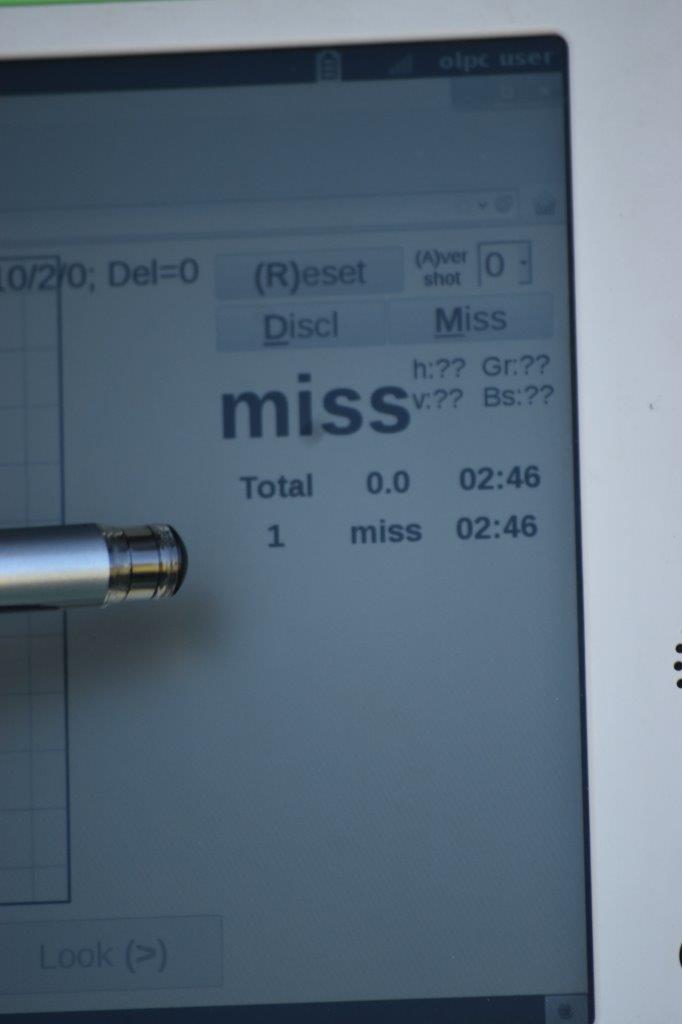
- Declare misses
Use the keypad for data entry – it is NOT a touch screen!
To “Enter” data, press the appropriate number or letter on the key pad OR use the touch pad to position the cursor in the correct field eg for a dropdown list and then Press the Left Hand bar (left mouse button) at the very bottom of the key pad to activate the selection.
Note that the UP and DOWN arrows on the right-hand side of the keypad can be used to scroll up and down a displayed list.
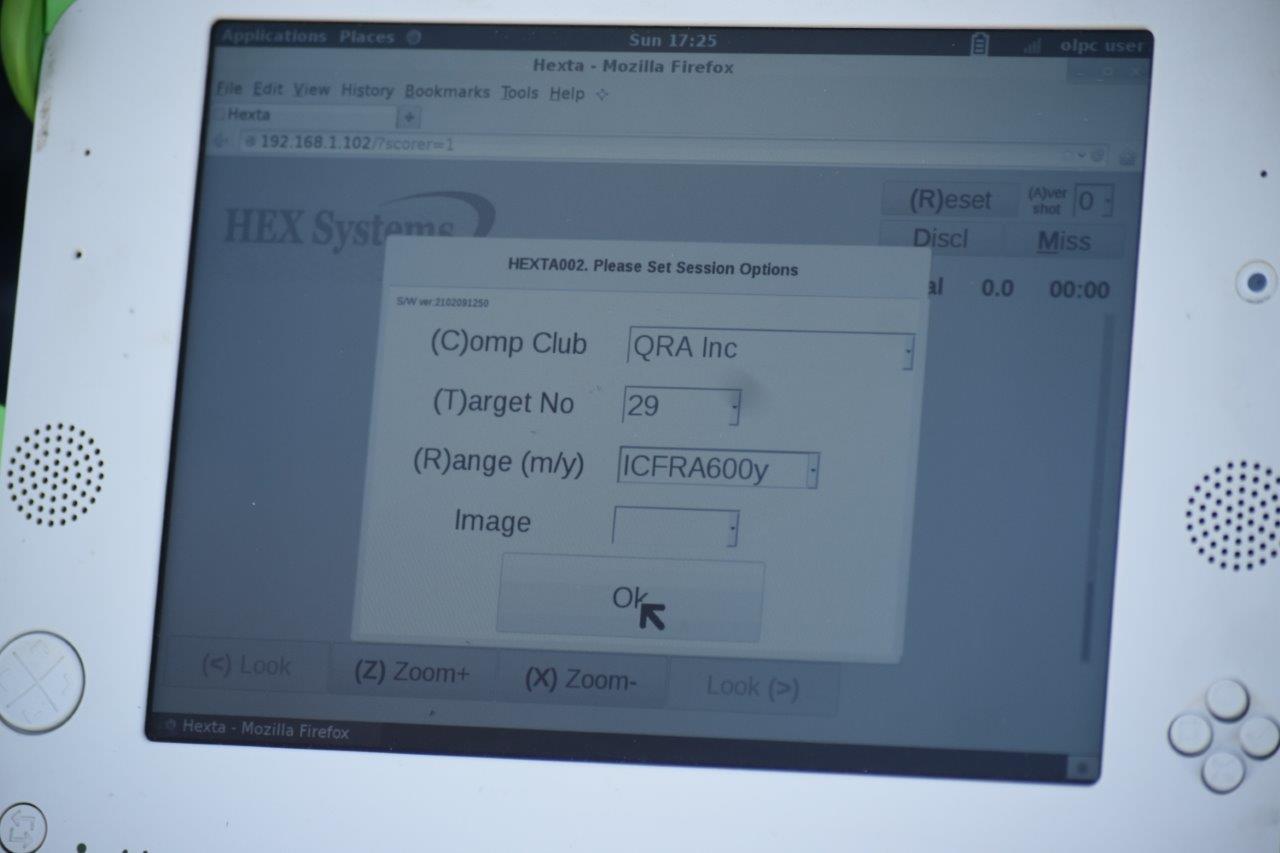
Use the 1st HEXTA Display Screen to setup the shooting session options
-
The “Competition Club”
Tthis is the club whose Hexta Database Administrator will approve the shooting results.
-
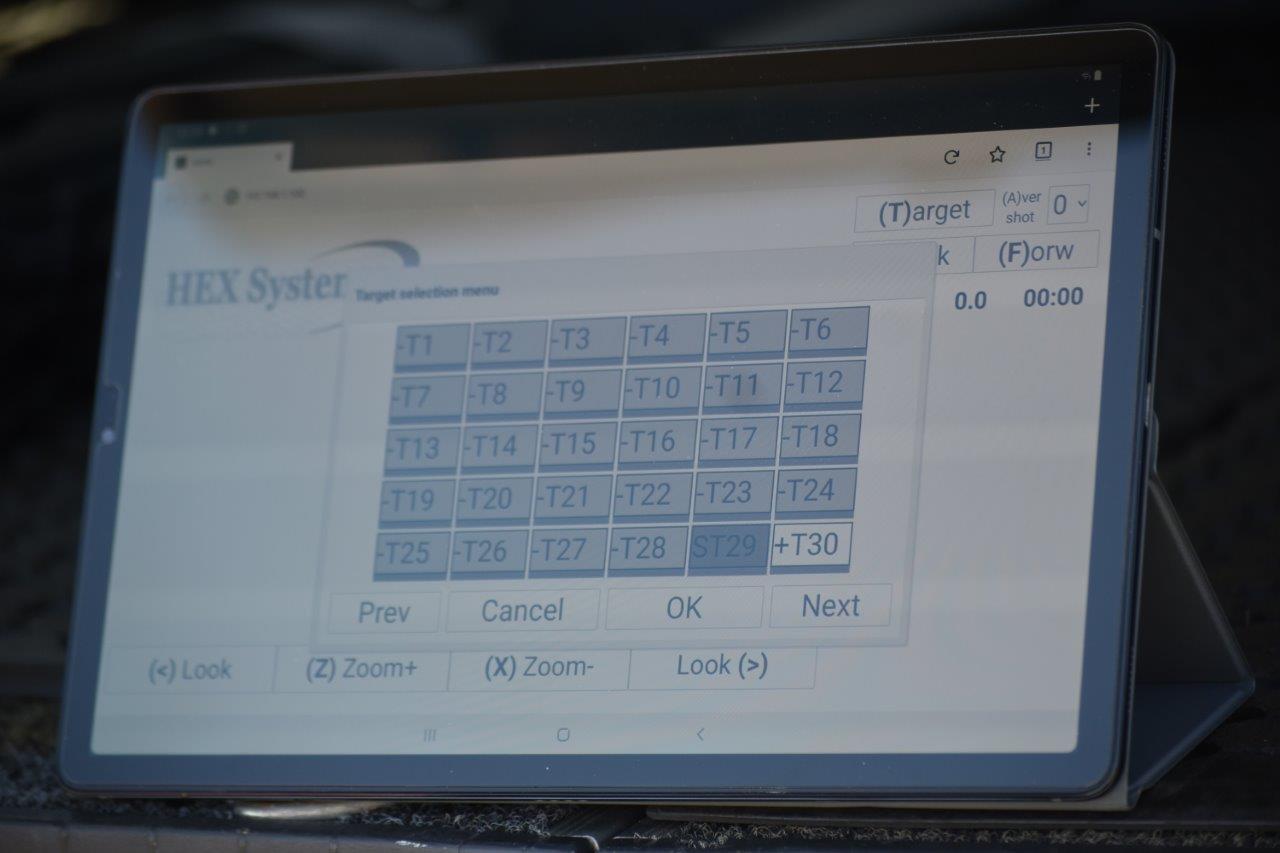
Set the ET Number
For the target that the monitor is to be connected to (Note this may not always correspond with the lane number, for example if an ET has a different number to the shooting lane or if a Scorer’s monitor is reassigned to a different ET).
-
Set the range distance
For the shoot.
-
Volume
Should only be adjusted by ET Assist members
Scorer’s can use quick keyboard shortcuts to:
- Cut the correct number of Sighters Use Number key (0, 1, 2)
- (R)eset – Press R key (Reset function) to close the current shooter string and open the new shooter dialogue box
- (D)isc – Press “D” key to activate the disclaim shots process
- (M)iss – Press the “M” key to insert a miss in the shot string
- (Z) Zoom +
- (X) Zoom –
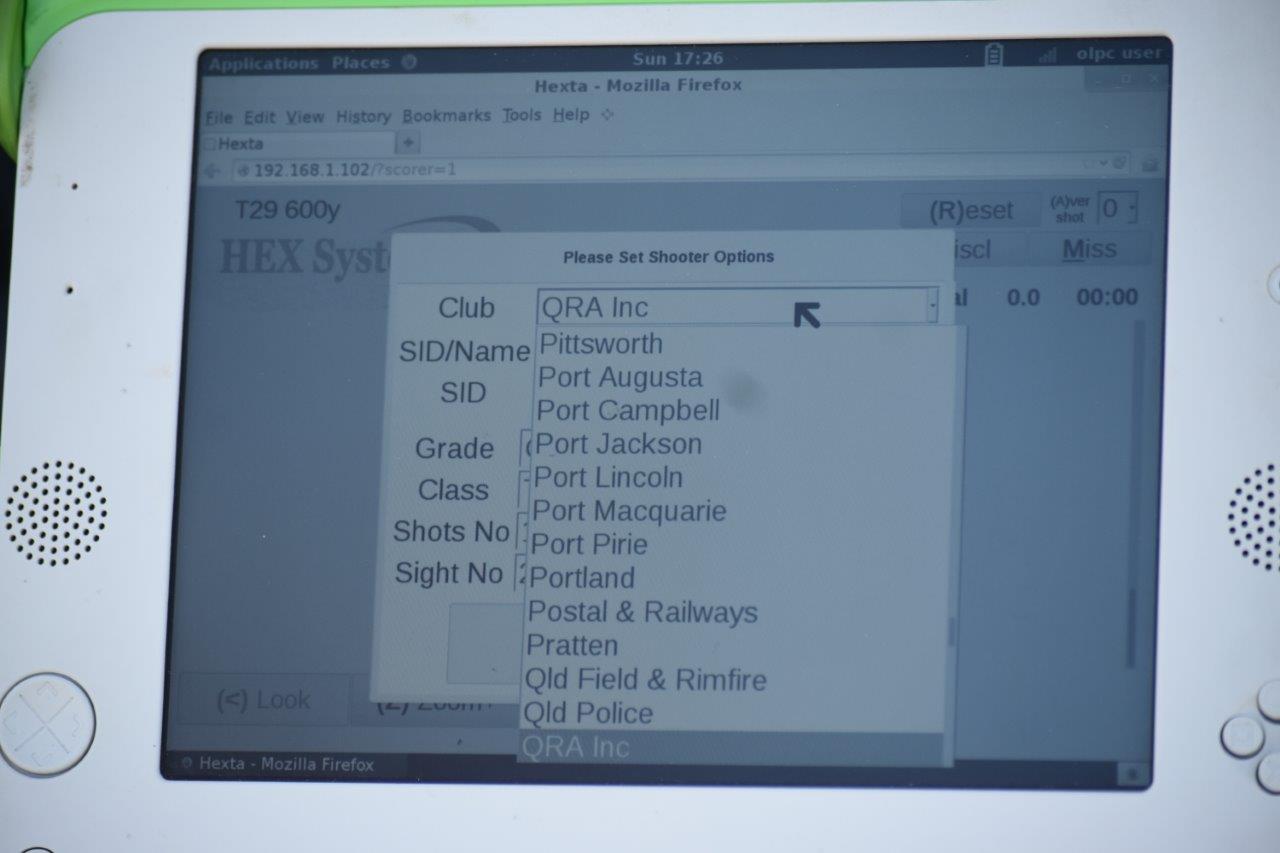
Use the 2nd HEXTA Display Screen menu to set the shooter options
When entering a new shooter check the following data fields are correct
-
Club
(ie Shooter’s Home Club)
-
Name
(ie Shooter’s Name)
-
Stage
(ie Shooting Stage)
-
Class
(ie shooting discipline)
-
Grade
(ie Shooters grading)
-
Shot Number
(ie number of shots to count)
-
Sighter Number
(ie number of Sighters to count)
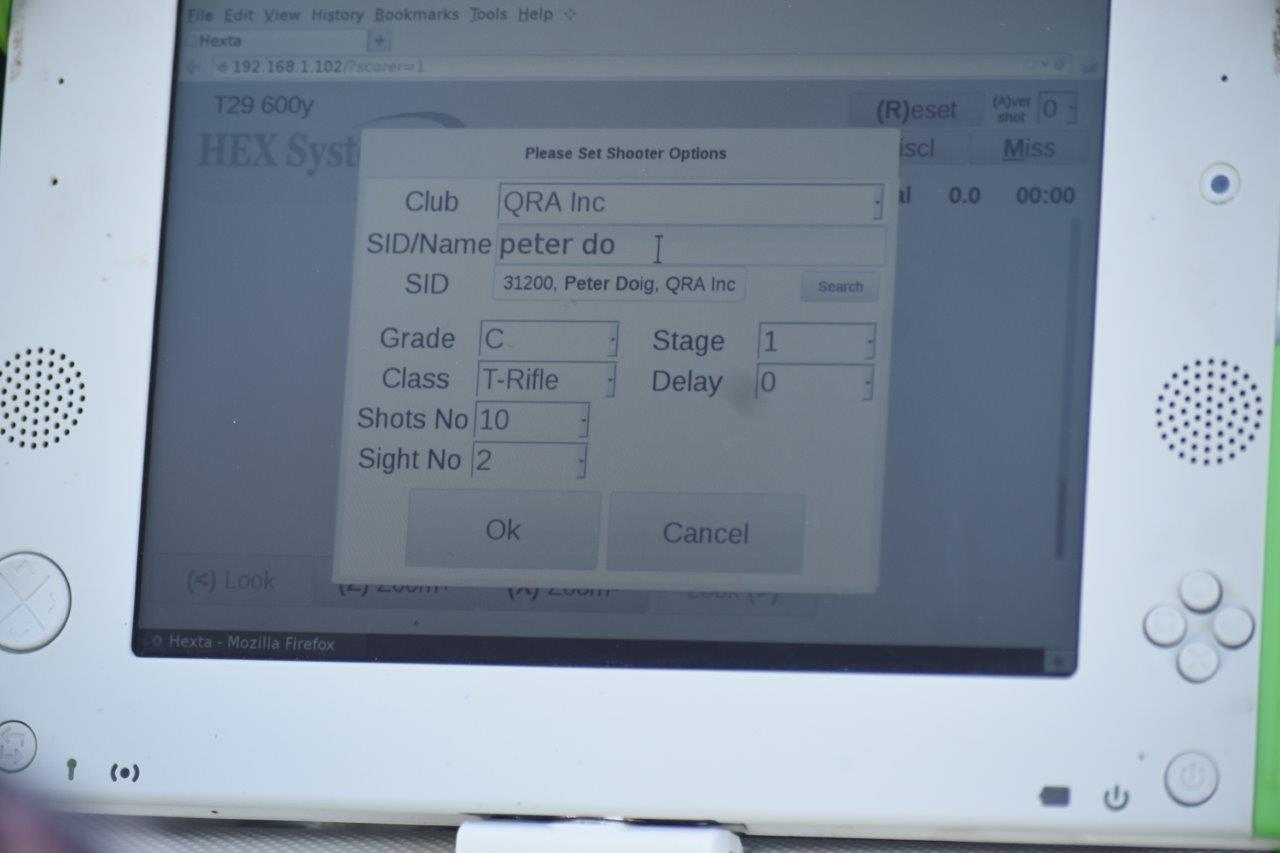
Scorer's monitor - Setting up a new shooter session
- Enter the shooter name or SID in the Name/SID field. If the correct shooter details appear below the input field then select the shooter and press the left “Mouse Button”. If the shooter details do not appear below the input field then use the “Search” function, by putting the cursor on the search field and pressing the left mouse button. Then select the correct shooter details when displayed.
- Check and ensure the correct shooting discipline and shooting grade are displayed in these fields.
- Check the correct Stage number is set.
- Check the correct number of shots and sighters is set for the shoot.
- Note: with all input fields on the scorer monitor the cursor may be positioned anywhere within the dialogue box, it is not necessary to position the cursor on the slender drop down arrow on the right hand side of the box.
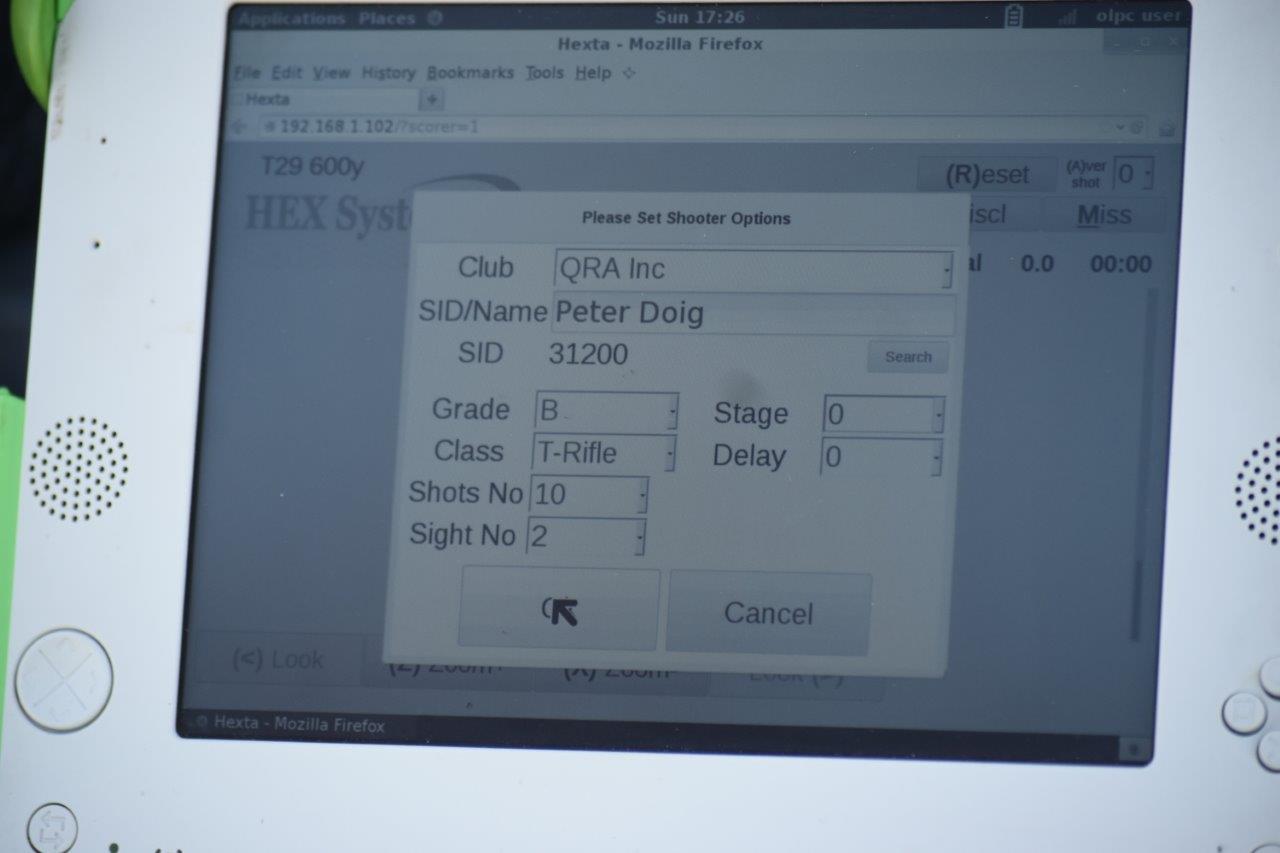
- When all the shooter input details have been checked as correct, position the cursor on the “OK” box and press the left mouse key.
- This will then refresh both shooter and scorer monitor’s ready for the new shooter to commence their shoot.
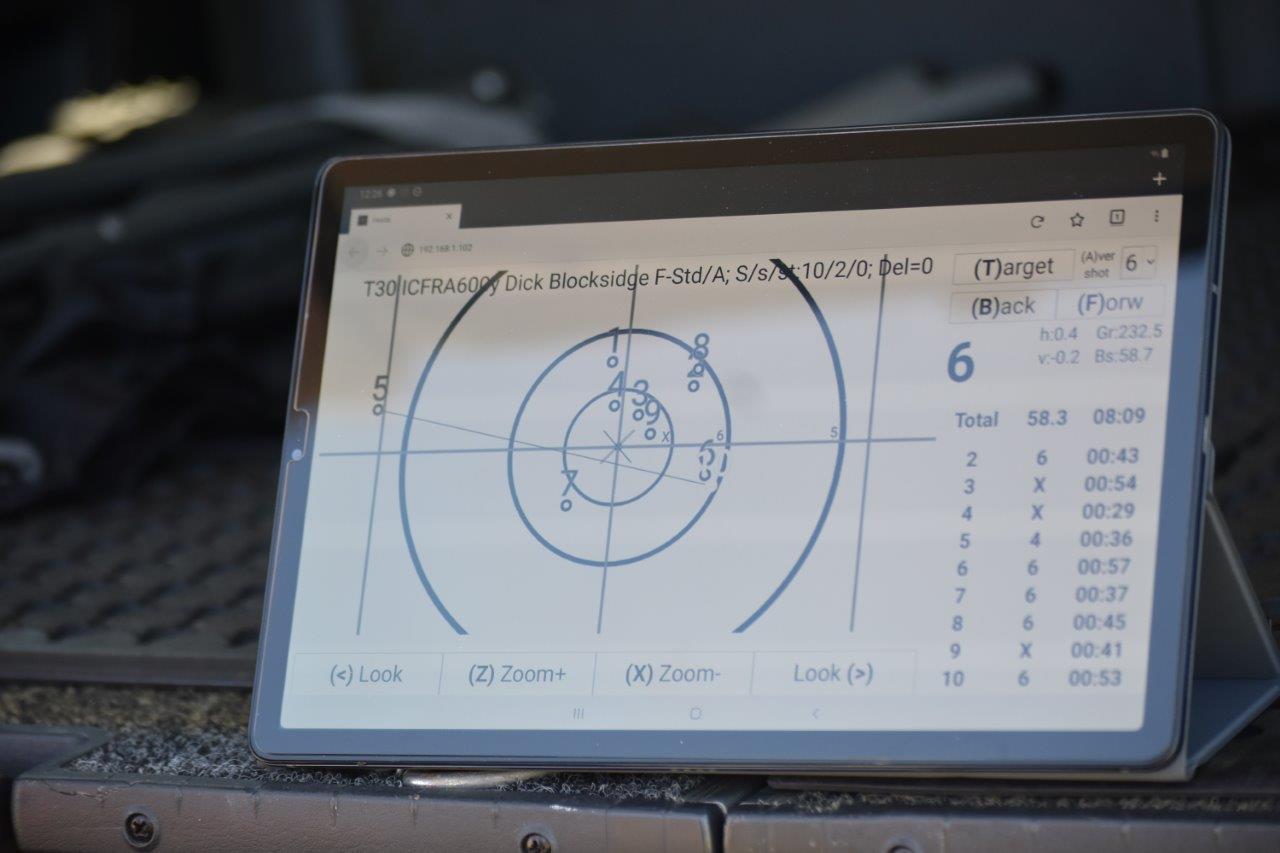
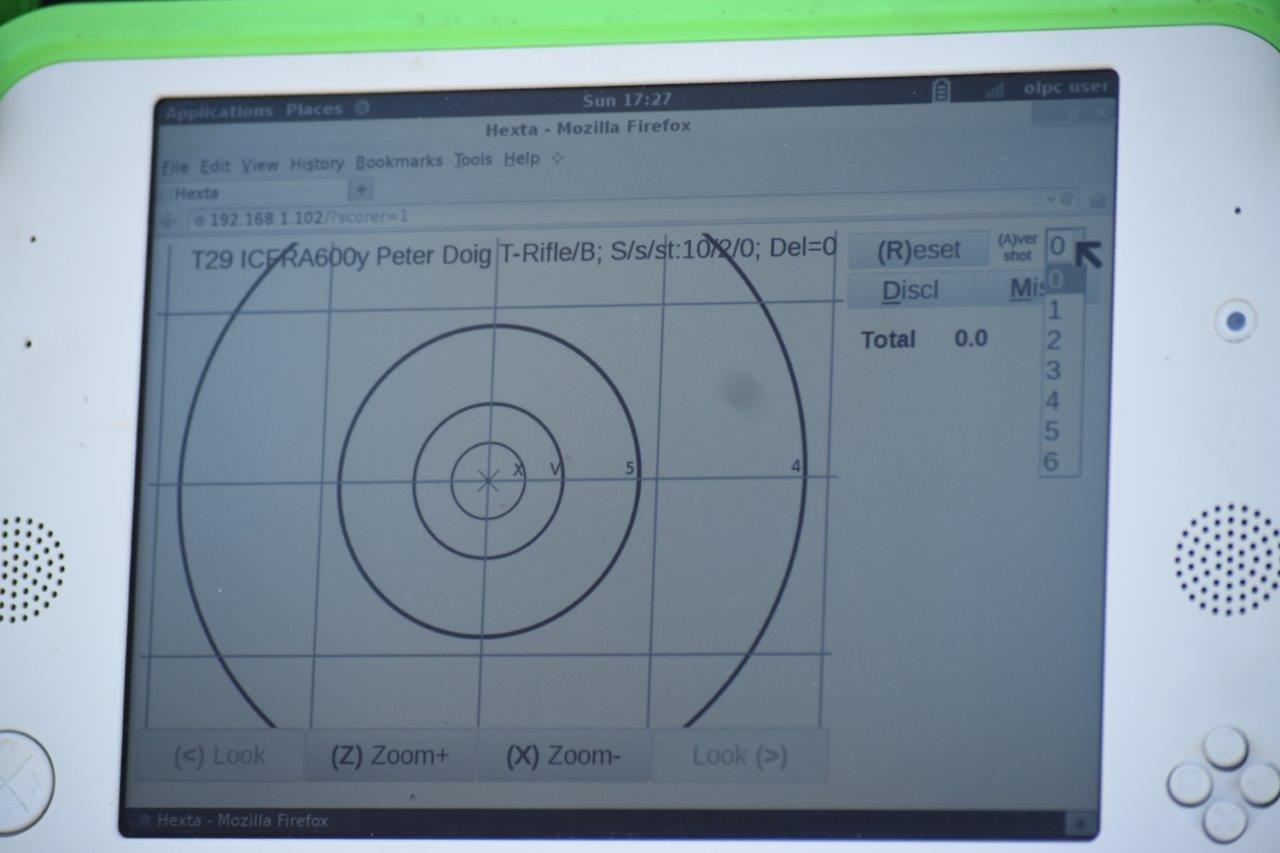
- Shot plot display – each grid line represents 1 MOA at every range distance and zoom level
- Zoom – 4 stages of zoom and then returns to initial zoom level
- Look Left and Look Right – this function is disabled on Scorer monitors as the responsibility of the Scorer is to solely focus on scoring for the shooter in their lane
- Volume – should only be adjusted by ET Assist members
- Centre of group – max 6 counting shots – leave set to “0” unless using
- Group Size – distance between furthest two shots
- Berdan String – In the HEXTA Database the Berdan string value is the average distance to the centre for all counted shots. The average value is updated with each additional shot.
Scorer's monitor - Functions & features
Details displayed on the top left of screen
- Target Number
- Shooting Distance
- Shooter Name
- Shooting Discipline
- Shooting Grade
- Number of counting shots
- Number of sighters
- Stage number
Note – Use Stage “0” for all practice and trial shooting. Only use Stage 1, 2 etc. for counting competition shoots.
Warning – Don’t leave monitors with screen facing directly into the sun as it may cause the monitor to overheat.
Note – Warning and Error Messages ONLY appear on the Scorers Monitor and DO NOT Display on the Shooters Monitor.
Warning and Error Messages
- Server not responding. Check that Range Server is powered ON, connected to the network (HEXSystems2) and the signal strength is ok.
- Target connecting. Check target battery is connected, target LED should display in rotation 8 sensor positions, target number and signal strength, and all monitors should have a strong network signal strength for the antenna they are connected to.
- Target battery is low – this message requires the Scorer to immediately advise the Range Officer so that corrective action may be taken. Then click on the OK button at the bottom of the message (still have about 1 hr battery life). It is recommended that the target battery is replaced as soon as possible AFTER the current shooter completes their shooting session.
- Error Message “Error: Shot outside scoring area. Probably hit frame”
As the Range Officer must decide on the subsequent action after this message appears, the following detail is provided for assistance.
The 56 POI calculations from the 8 sensors around the target frame have detected a shot, however as the POI is outside the scoring area the exact location cannot be determined. It is most probable that the shot hit the target frame.
HEX Systems recommends that a “Miss” is recorded.
Action: Manually enter a “Miss” in the shot string on the Scorer’s monitor - Error Message “Error: Shot position cannot be accurately resolved”
In order to assist the Range Officer in their decision on the subsequent action after this message appears, the following detail is provided.
The 56 POI calculations from the 8 sensor have resulted in an enlarged shot plot, and as a result the system cannot determine, with a high level of accuracy, the POI. The shot may have been within the scoring area of the target, and the most likely cause of this type of shot plot is that the projectile has hit near an edge of the target, or was a ricochet, or tumbling when it hit the target, or a hole has developed in the centre of the target rubber membrane allowing the sound wave to be detected early by some sensors.
HEX Systems recommends that the shooter fires another shot.
Action: Subject to Range Officer approval, the shooter fires their next shot.
The Scorer MUST fix any errors in the shot string before resetting for the next shooter.
To reset press the “R” on the key pad and wait for the screen to refresh -this may take 30 – 40 sec.
Note shooters who leave the firing point for any reason before they have completed their stage shoot, must have their shooting session closed, and if they return at a later time to complete the remainder of their stage shoot then ET support staff should be called to set up the correct details for the remaining shots allowed in this shooters shooting session.
Quick Links
Our Location
Belmont Shooting Complex
- 1485 Old Cleveland Road, Belmont Qld, 4153
- PO Box 38, CARINA QLD 4152
- 07 3398 4309
- qra@qldrifle.com
- Duncan Range Standing Orders - Refer to the office
- GIVEITASHOT & FSC registration is via RevolutioniseSport management
Quick Links
About Us
The Queensland Rifle Association fosters target rifle shooting and firearms training through our clubs. Different classes of rifle shooting are conducted by our Clubs under the Standard Shooting Rules (SSRs) of the National Rifle Association of Australia (NRAA).


NRAA Quicklinks
Our Location
Belmont Shooting Complex
- 1485 Old Cleveland Road, Belmont Qld, 4153
- PO Box 38, CARINA QLD 4152
- 07 3398 4309
- qra@qldrifle.com
- Duncan Range Standing Orders - Refer to the office
- GIVEITASHOT & FSC registration is via RevolutioniseSport management